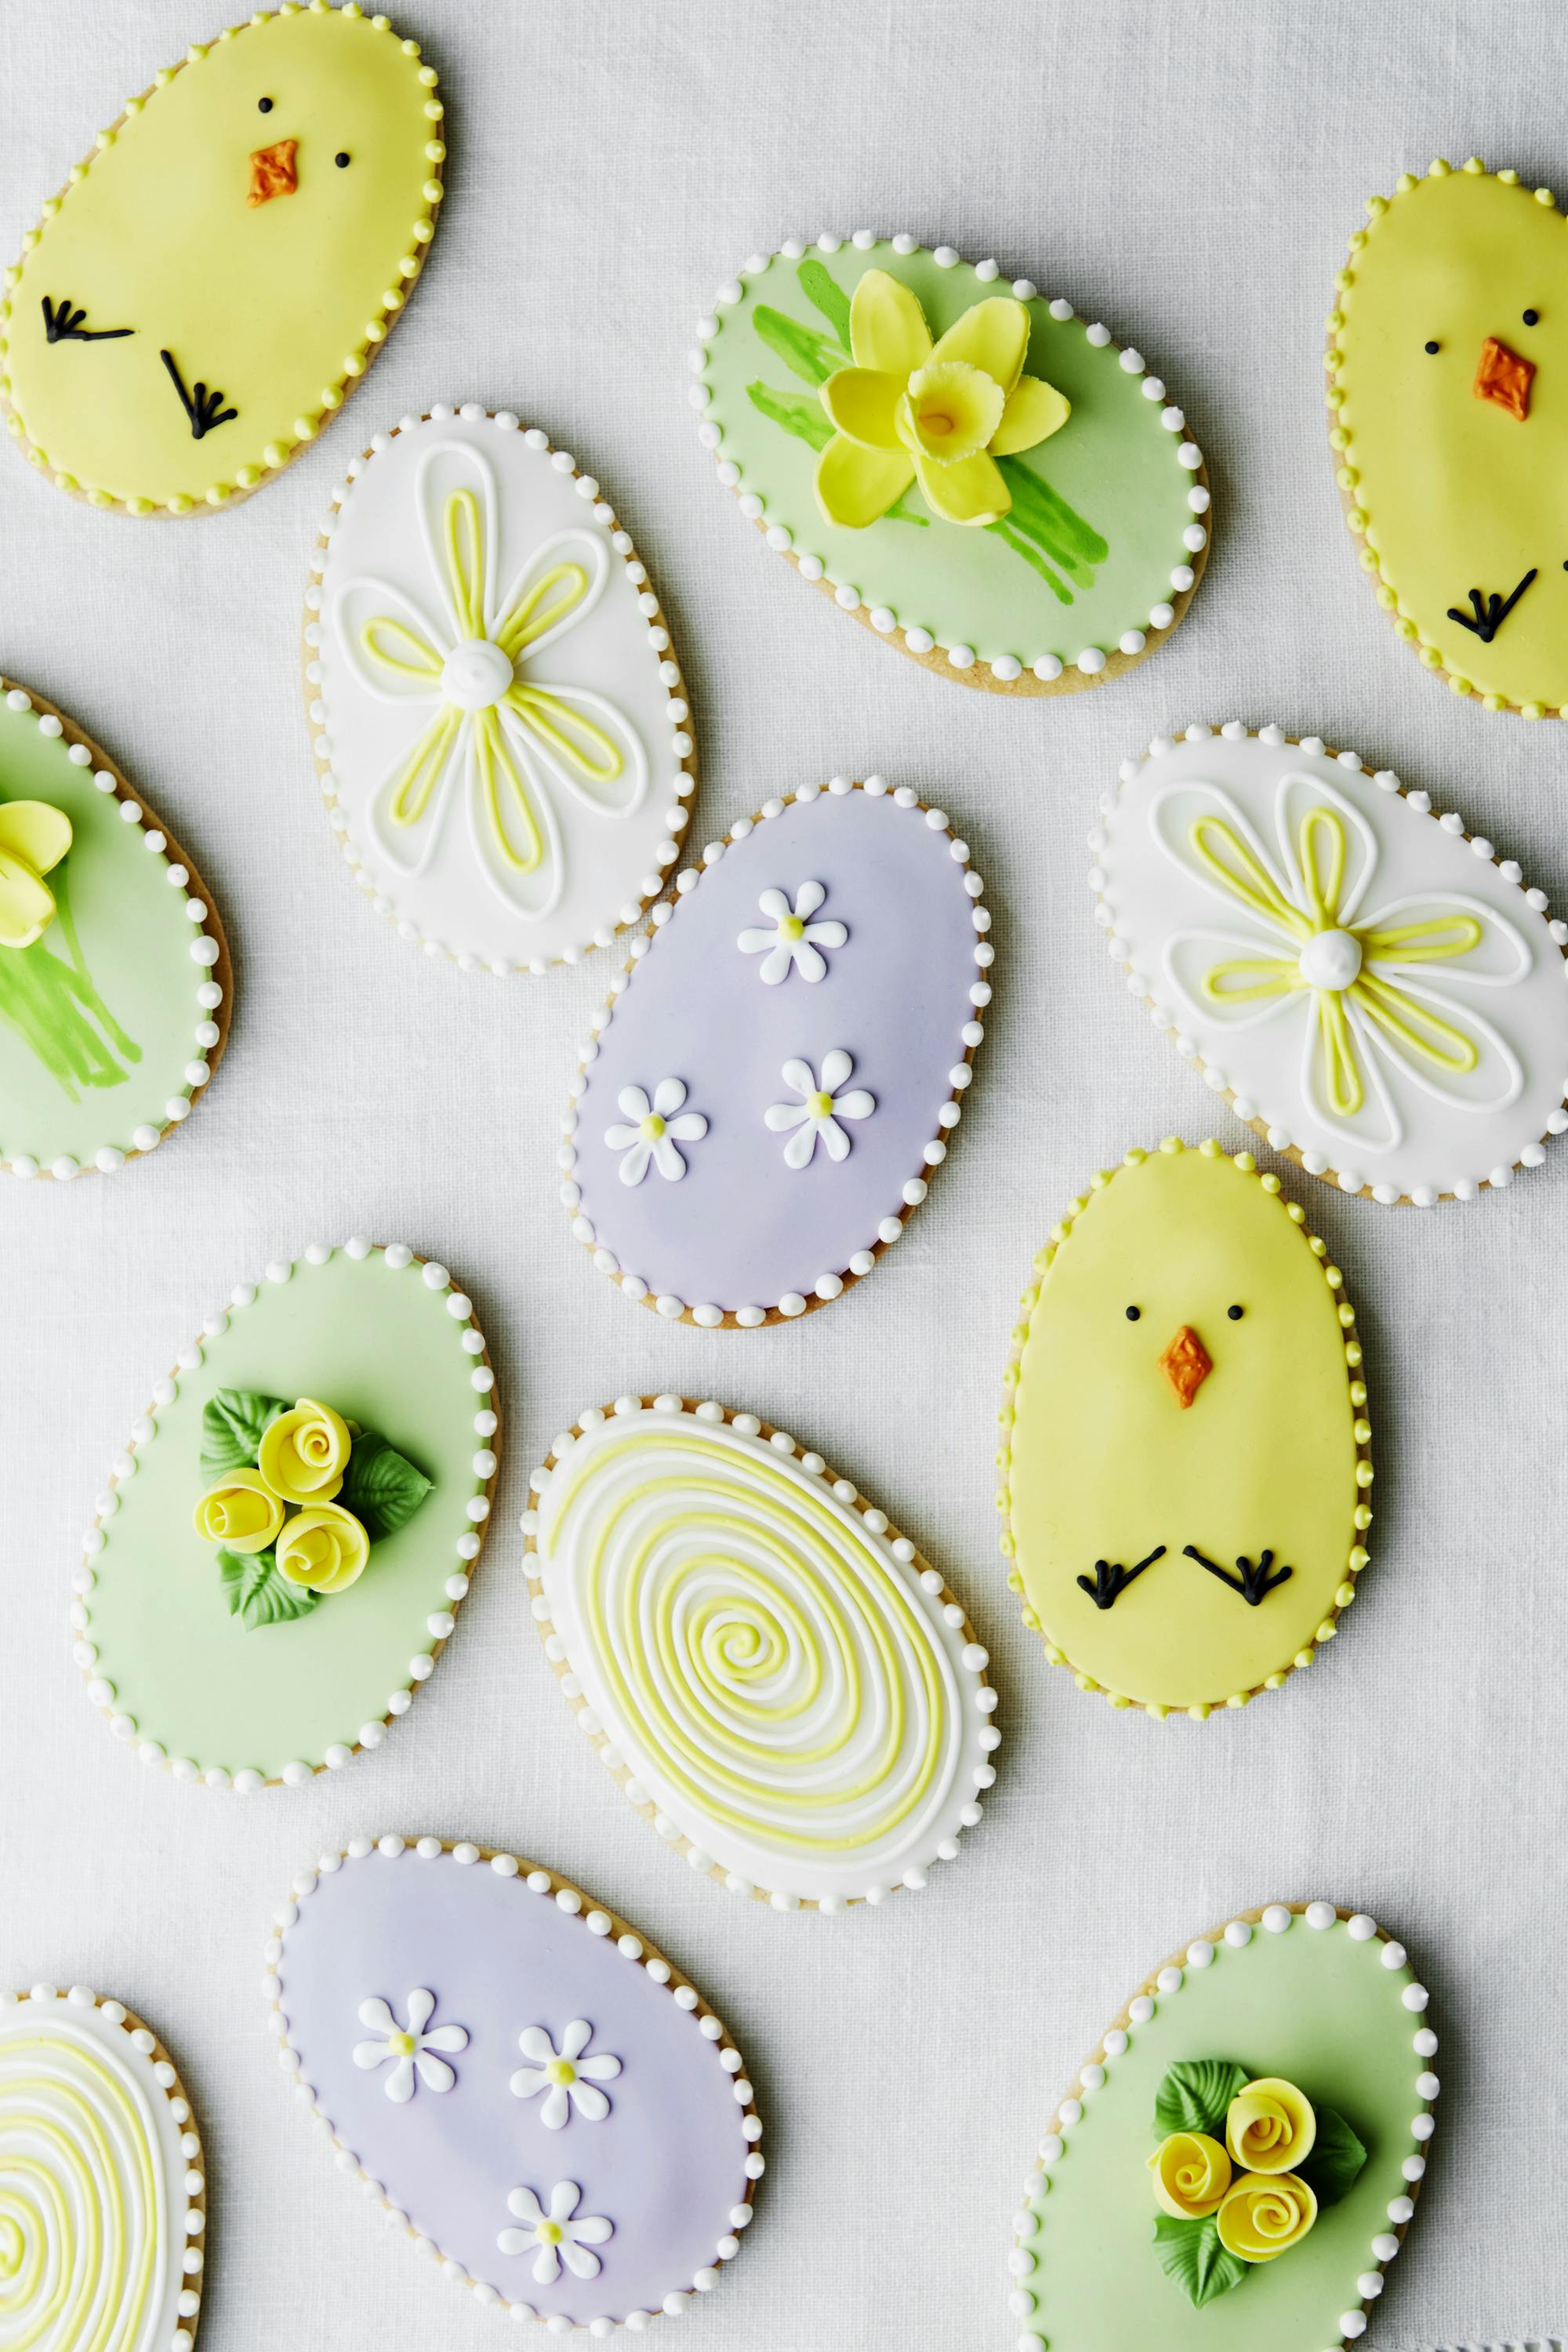
These fully hand-decorated Easter biscuits are a fabulous way to showcase your skill and creativity. Cute, fresh, fun and frivolous, they bring joy and a sunny smile to your Easter table. They can be presented individually as gifts or even made into an Easter wreath.
Makes 30–40 biscuits
For the biscuits:
200g (7oz) unsalted butter, softened
200g (7oz) golden caster sugar
1 medium egg, beaten
1 tsp vanilla powder or 2 tsp vanilla bean paste
400g (14oz) plain flour, plus extra for dusting
1 heaped tsp baking powder
1. Cream the butter and sugar together in a stand mixer until light and fluffy.
2. Add the beaten egg and vanilla until fully incorporated and then add the flour and baking powder. Mix just until the dough comes together. Wrap in cling film and chill for 30 minutes.
3. Preheat the oven to 180°C fan (200°C/400°F/Gas 4). Line a baking tray with non-stick baking paper.
4. Knead the dough on a lightly floured work surface and then roll out gently to a thickness of 3–4mm (⅛ inch). Stamp out shapes using Easter-shaped cutters. Place on the prepared baking tray, leaving a little space between the biscuits.
5. Bake for 8–10 minutes until lightly golden brown on the edges. Remove from the oven, leave to cool for a few minutes and then lift on to a wire rack with a palette knife to cool completely.
For the decorations:
coloured fondant sugar paste (allow 30g/11⁄4oz per biscuit)
1 quantity of Royal Icing in different colours
sugar flowers (optional)
colour dusts mixed with a little rejuvenator spirit or cooled, boiled water, for painting (optional)
yellow coloured gum paste
1. Once the biscuits are cool, roll out different colours of sugar paste fondant. Cut out shapes using the same cutters as you used for the biscuits (see page 175).
2. Dot royal icing on the biscuits and fix the sugar paste cut-outs in position.
3. Add extra coloured hand-piped pearls around the edge of the biscuits using a No. 2 nozzle and your chosen coloured royal icing.
4. For the daisies – pipe a series of white pearls joined together with a yellow centre.
5. For the chicks – pipe the eyes and feet with black royal icing and add a hand-piped orange beak.
6. For the swirls – starting at the centre of the biscuit, with one colour, hand pipe a thick swirl to the outer edge. Fill between with a second swirl in a contrasting colour.
7. For the daffodils – hand mould the daffodils from yellow coloured gum paste using a daffodil cutter. Leave to dry overnight. Blend the colour dusts with the rejuvenator spirit or water and brush long leaves and stems onto the biscuit. Fix the daffodils in position with royal icing.
8. For the buttercups – make tiny yellow 3-petal bud flowers from sugarpaste and leave to firm. Pipe 3 green leaves using a leaf-nozzle and position the flowers in the centre.
The biscuits will keep for up to 14 days once decorated if they are stored in a cake box or lightly sealed container.
Click here for more information on, and to buy, Everyday Bakes to Showstopper Cakes by Mich Turner MBE.